Myths about teaching can hold you back
- Year 8
Refracting light
I can describe and draw how a ray of light refracts when it moves from one medium to another, and explain how refraction can cause virtual images.
- Year 8
Refracting light
I can describe and draw how a ray of light refracts when it moves from one medium to another, and explain how refraction can cause virtual images.
These resources will be removed by end of Summer Term 2025.
Switch to our new teaching resources now - designed by teachers and leading subject experts, and tested in classrooms.
These resources were created for remote use during the pandemic and are not designed for classroom teaching.
Lesson details
Key learning points
- Light changes direction when it moves into a new medium (material) at an angle to the normal. This is called refraction.
- When light enters a transparent material from air, it turns towards the normal.
- When light leaves a transparent material and re–enters air it turns away from the normal.
- A ray that enters and leaves glass through parallel sides ends up in its original direction, but displaced to the side.
- Refraction can cause virtual images of objects to appear where light seems to be coming from.
Keywords
Transmit - when light moves into and through a new medium
Medium - the material that light is travelling through
Refraction - when light changes direction when it enters a new medium
Normal - a line drawn at 90° to the surface of a material
Virtual image - a representation of an object seen where light appears to be coming from, not where light actually comes from
Common misconception
A ray of light curves as it passes through glass, perspex or water.
Use a perspex block with the bottom painted white to demonstrate the path of a ray of light through it. Avoid putting too much emphasis on the term 'bending' light, instead try to primarily refer to light changing direction at a boundary.
To help you plan your year 8 science lesson on: Refracting light, download all teaching resources for free and adapt to suit your pupils' needs...
To help you plan your year 8 science lesson on: Refracting light, download all teaching resources for free and adapt to suit your pupils' needs.
The starter quiz will activate and check your pupils' prior knowledge, with versions available both with and without answers in PDF format.
We use learning cycles to break down learning into key concepts or ideas linked to the learning outcome. Each learning cycle features explanations with checks for understanding and practice tasks with feedback. All of this is found in our slide decks, ready for you to download and edit. The practice tasks are also available as printable worksheets and some lessons have additional materials with extra material you might need for teaching the lesson.
The assessment exit quiz will test your pupils' understanding of the key learning points.
Our video is a tool for planning, showing how other teachers might teach the lesson, offering helpful tips, modelled explanations and inspiration for your own delivery in the classroom. Plus, you can set it as homework or revision for pupils and keep their learning on track by sharing an online pupil version of this lesson.
Explore more key stage 3 science lessons from the Making images unit, dive into the full secondary science curriculum, or learn more about lesson planning.

Equipment
Transparent rectangular blocks, ray boxes (and power supplies if needed), coins (or heavy counters), mugs/white plastic cups (or similar open–topped, non–transparent containers), beakers.
Content guidance
- Risk assessment required - equipment
Supervision
Adult supervision required
Licence
Prior knowledge starter quiz
6 Questions
Q1.When a wave bounces back from a surface or boundary, this is called .
Q2.Which of the following types of material transmit light?
Q3.Which of the following statements describe a light ray?
Q4.Which of the following describe the normal in a ray diagram for reflection?
Q5.A representation of an object seen where light appears to come from, not where light actually comes from, is called a image.
Q6.Which of the following best describes the conclusion of an experiment?
Assessment exit quiz
6 Questions
Q1.Which of the following is a definition of ‘medium’?
Q2.Which of the following is a definition of ‘refraction’?
Q3.Which of the following are possible when light hits a boundary between two materials?
Q4.An incident ray hits a boundary between air and glass. There is no refraction if the angle of incidence is...
Q5.The diagram shows three light rays entering a block of glass. Which of the following statements are correct?
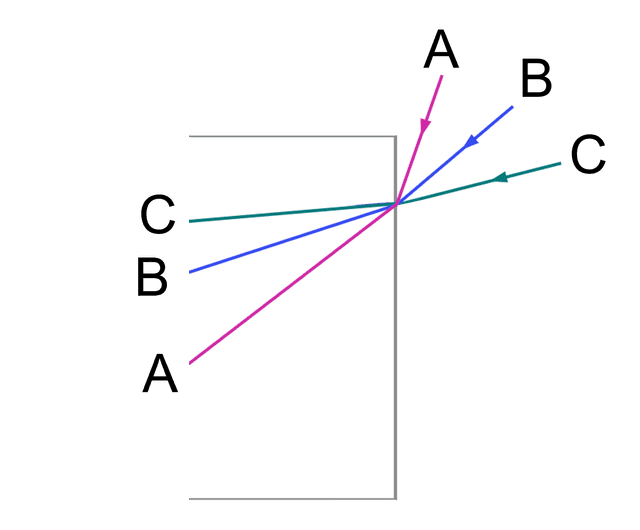
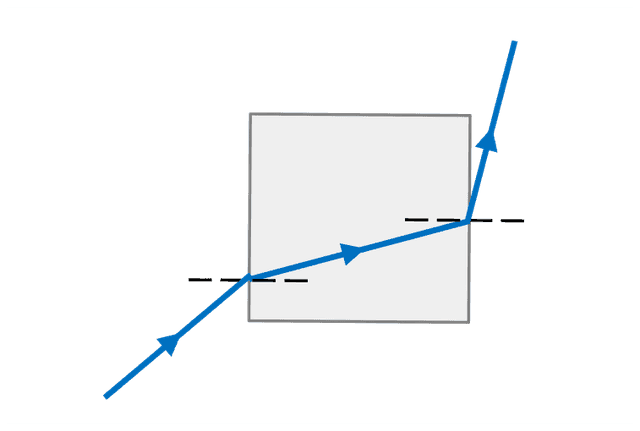
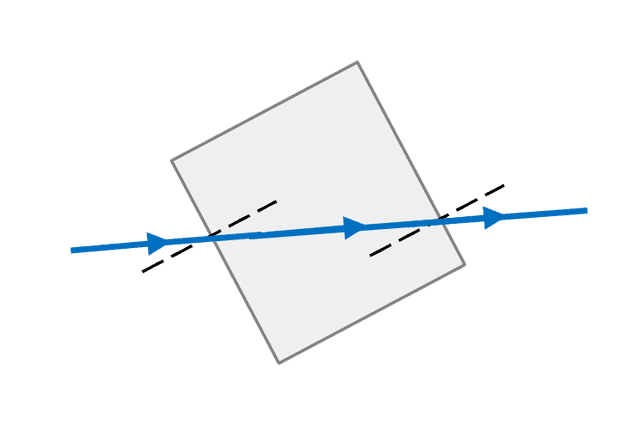
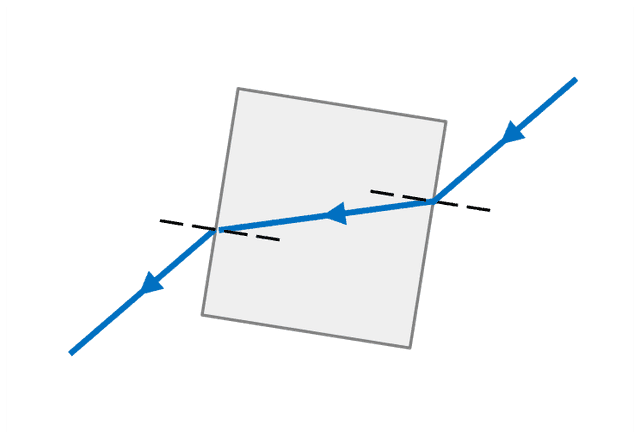
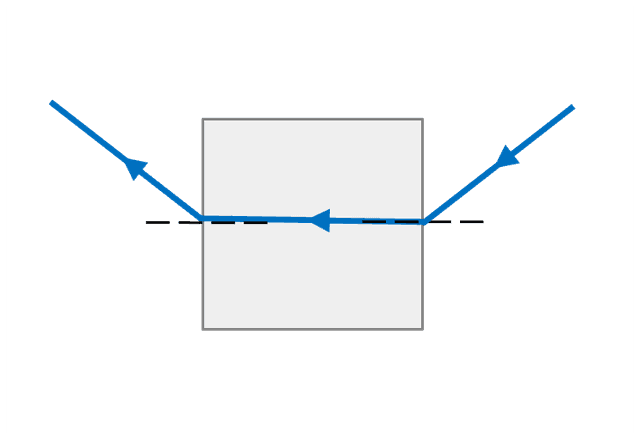
Q6.Which of the following diagrams show possible paths of light rays passing through transparent rectangular blocks?
