Myths about teaching can hold you back

- Year 7
Reflections in mirrors
I can explain why reflections (images) are seen in mirrors and describe the properties of mirror images.
- Year 7
Reflections in mirrors
I can explain why reflections (images) are seen in mirrors and describe the properties of mirror images.
Lesson details
Key learning points
- Light reflects from mirrors obeying the laws of reflection. Some reflects into our eyes causing an image to be seen.
- The image in a mirror is located where the light rays seem to have come from.
- A reflection appears to be directly opposite the object, the same distance behind the mirror as the object is in front.
- The image in a mirror is the right way up but is laterally inverted.
Keywords
Reflection - this word has two meanings: 1. the process of light 'bouncing off' a surface, 2. an image seen in a mirror
Image - a representation of an object
Laterally inverted - describes an image that has been 'flipped' horizontally (as occurs in mirror images)
Common misconception
Ideas about the nature of light and reflections are often taken for granted at this stage and simple misconceptions often persist, e.g. that all reflections appear to be on the surface of mirrors.
Give pupils practical experience of systematically investigating reflections, e.g. measuring the apparent location of a mirror image. Explicitly assess for misconceptions about the location and visibility of mirror images of an object.
To help you plan your year 7 science lesson on: Reflections in mirrors, download all teaching resources for free and adapt to suit your pupils' needs...
To help you plan your year 7 science lesson on: Reflections in mirrors, download all teaching resources for free and adapt to suit your pupils' needs.
The starter quiz will activate and check your pupils' prior knowledge, with versions available both with and without answers in PDF format.
We use learning cycles to break down learning into key concepts or ideas linked to the learning outcome. Each learning cycle features explanations with checks for understanding and practice tasks with feedback. All of this is found in our slide decks, ready for you to download and edit. The practice tasks are also available as printable worksheets and some lessons have additional materials with extra material you might need for teaching the lesson.
The assessment exit quiz will test your pupils' understanding of the key learning points.
Our video is a tool for planning, showing how other teachers might teach the lesson, offering helpful tips, modelled explanations and inspiration for your own delivery in the classroom. Plus, you can set it as homework or revision for pupils and keep their learning on track by sharing an online pupil version of this lesson.
Explore more key stage 3 science lessons from the Sound, light and vision unit, dive into the full secondary science curriculum, or learn more about lesson planning.

Equipment
Transparent plastic or glass that can stand vertically (e.g. safety screens), candles/LEDs, clamp stands (if necessary), rulers/meter rules (depending on the size of other equipment used).
Content guidance
- Risk assessment required - equipment
Supervision
Adult supervision required
Licence
Lesson video
Loading...
Prior knowledge starter quiz
6 Questions
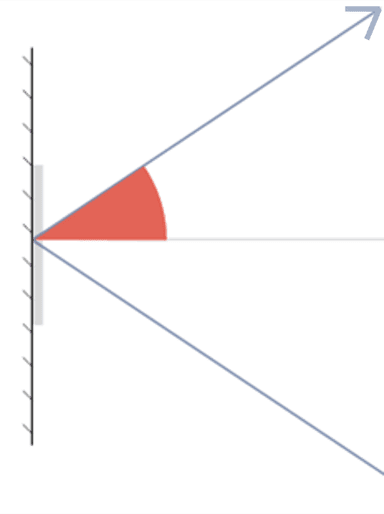
Q1.The first law of reflection states that when light reflects, the angle of reflection is always equal to the angle of .
Q2.When a light ray reflects, the two rays and the normal are all in the same __________.
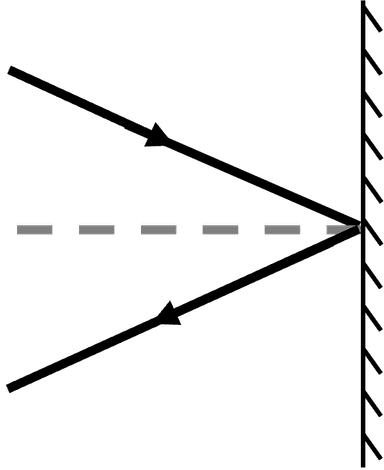
Q3.The diagram shows the reflection of a light ray. What is the name of the imaginary line, drawn as a dashed line?
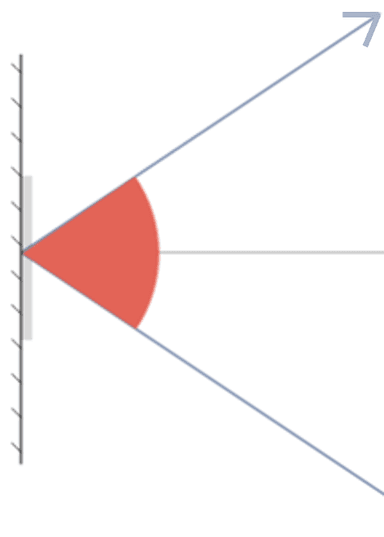
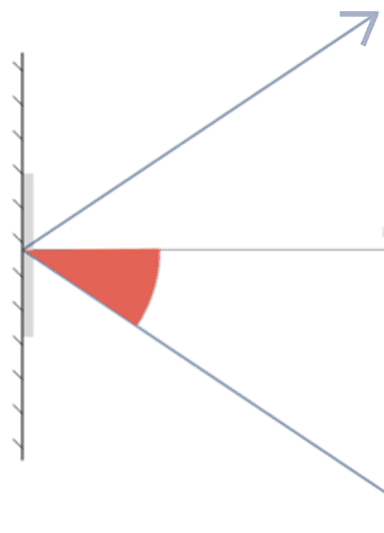
Q4.The diagrams show a light ray reflecting from a mirror. In which diagram is the angle of reflection marked?

Q5.A pupil uses a ray box and a mirror to investigate reflection. To measure angles, they use a protractor with markings that are 1° apart. Which of the following statements are correct?
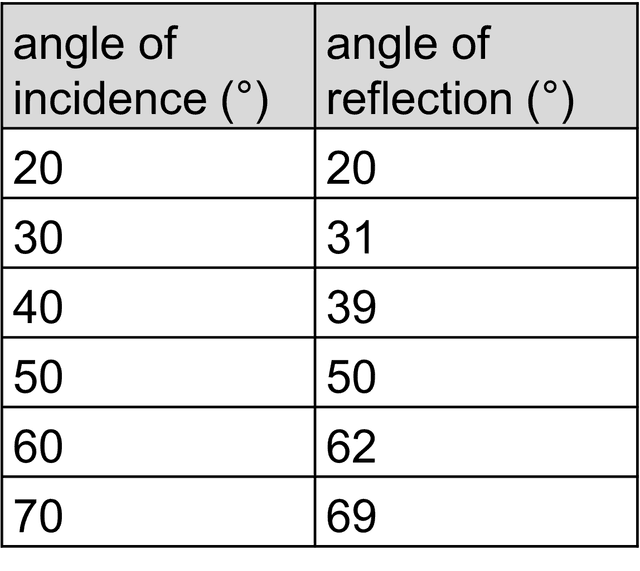
Q6.A pupil investigates the angles of reflection for different angles of incidence when light reflects off a mirror. The table shows the results. Which of the following conclusions is correct?
Assessment exit quiz
6 Questions
Q1.A person stands in front of a mirror. Which of the following describes the path that light takes so that the person can see their nose in the mirror?
Q2.A child holds a toy and looks into a mirror. In the mirror, they can see __________ of the toy.
Q3.Which of the following are definitions of the word ‘reflection’?
Q4.Which of the following terms describe how images in mirrors appear compared to the object?
Q5.A child holds a marble in front of a mirror, 10 cm away from the mirror. The child sees the marble in the mirror. How far apart do the real marble and the image of the marble in the mirror seem to be?
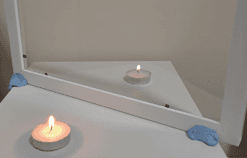
Q6.The photo shows two candles with a sheet of glass between them. The nearer candle is lit. The candle behind the glass seems to be burning, even though it is not. Which of the following explains why?